A Beginners Guide to Artist Alley: What to bring?
What Can I Expect At My First Con?
The one word that I hear the most when I ask people about their first anime or comic convention experience is: Overwhelming. From walls of adorable plushies to seeing a cosplay group of Sailor Scouts, there's a lot to look at at these anime conventions. As vendors, it becomes a whole different experience than being an attendee, but those overwhelming feelings are still the same for first timers in the Artist Alley. After our first convention at Anime California in 2014, we began to test out new products, adjust prices and experiment with different set ups at other cons. These tips are what we have discovered to have worked for us so far. Take these tips as guidelines to help you get started and then branch off to experiment with what works best for you! If you have any questions feel free to leave a comment below!
The Standard Artist Alley table package costs between $100-$400 and usually includes...
A single 6 x 2 Ft. table
2 chairs
1 Artist Alley vendor badge
Many cons also offer upgraded options for an additional charge such as a corner or endcap premium. Although not necessary for first time Artists, this is a great option to consider in the future when you feel ready to pay a bit more for a better location in the convention hall. We always try to get a corner table if the option is available as opposed to an inline table because it gives you a bit more space and you generally have more foot traffic. Some cons don't give you a choice but you will tend to have the option to enter your preference in terms of location. If a convention's application doesn't ask for your preference, don't be afraid to send a friendly email letting them know your preferred location prior to placement, it’s worth a try!
The artist alley table package provides you with a great base to build off with for your artist alley set up, but you'll definitely need a bit more items before you're ready to sell. Below are a few of our essential supplies of what to bring to your first artist alley!
STORAGE FOR INVENTORY

Since art prints are easily bendable, its important to keep them safe in a bin thats sturdy, liquid proof and easy to carry. Invest in a nice sturdy plastic bin that can easily be transported to and from your car to the venue.
We enjoy bins that are also stack-able. This is helpful for keeping your workspace organized especially behind a small booth. These weather-tight storage boxes are great for art prints that are 9x12” or smaller. The hanging document dividers are perfect for organizing different print designs. We opt for the weather tight pro option because we do a handful of outdoor art walk events, so durability was a must for us. If you don’t plan on doing too many outdoor events the standard containers are another great and affordable option!
A PLACE TO STORE CASH
You will be in a very casual environment with a lot of people walking in and around your table making it more difficult to focus on suspicious activity. Having a fanny pack is extremely convenient, because it will be on you 100% of the time. I absolutely LOVE fanny packs, especially when traveling and at conventions. All your essentials are easily accessible and won’t leave your sight. Find a fanny pack with multiple pockets so you can keep your change and other items a bit more organized.
Don’t forget to bring at least $100-200 worth of change! (Depending on your prices) We usually do the following:
Tens - 10
Fives - 20
Ones - 10
Another option is a cash box. Although bulky to have around, its very useful if your dealing with coins and want something more organized. This cash box has a security cable that you can attach to the table, for added safety. Just be sure to NEVER leave your cash box unattended. After each day, take it back home with you or take all the valuable contents out before you leave.
A CREDIT CARD READER
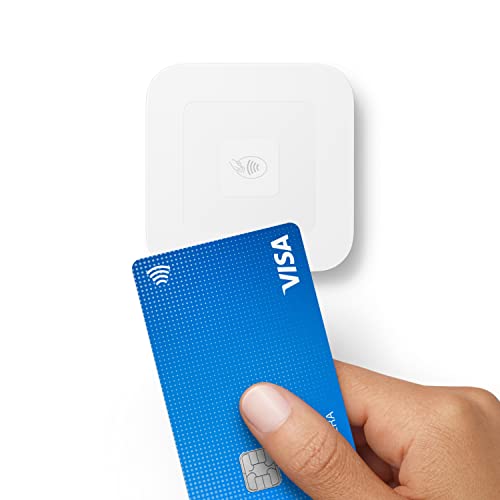
This is an absolute MUST HAVE item for conventions. If you don't accept card, you are essentially giving up half of your potential sales, especially after the pandemic, more customers prefer using tap. Although there are transaction fees for every purchase, we found that the fees are minimal compared to the amount of customers you gain.
We use the Square readers because they’re easy to operate and provide you with great analytical data for tracking sales. They also have an offline mode feature which is handy for when there's no signal in the convention hall. We carry both the contactless chip and magstripe readers for added convenience. A new feature is TAP on the phone which doesn’t require a reader at all. It’s still a agood idea to have the both the chip and magstripe reader to cover all your bases.
If you opt for the older Square Reader swiper with the headset jack, be sure to get the headphone jack adapter, for those with the latest Iphone’s!
Another option is taking payments via Venmo or Zelle. I’ve seen people print out signage of their QR code for customers to scan. There are plenty of digital payment options to choose from so do your research and pick one that works best for you!
A PORTABLE BATTERY PACK

Most conventions run for 3 days over the weekend (Friday, Saturday and Sunday). The convention hall will usually stay open for about 8 hours. Many tables don’t provide electricity, so if you have a phone with a weak battery, you’ll probably need to charge up some time in the day. Portable battery packs are lifesavers. The prices range from about $15 for a simple single outlet battery to upwards of $50 for multiple USB ports plus other bells and whistles. When searching for battery packs, usually the higher the mAh (charging power), the higher the price and size of the battery. I like the ones that have multiple USB ports, so you can charge multiple devices at the same time. Also find one that is at least 10000 mAh or higher, as these can fully charge the average smartphone at least 2-3 times. If you want to charge larger devices such as an Ipad , I’d definitely suggest buying a charger with at least 20000mAh. Choose one that fits your needs of charging time and functionality. Remember to charge your portable charger the night before the convention!
AN EMERGENCY SUPPLIES KIT

We pack an Emergency Kit for every convention because anything and everything can happen and you want to be prepared. We usually put basic items such as scissors, tape, post-its, pens, sharpies - to random tools such as a cutting pliers, zip-ties, Advil/Tylenol, band-aids, face masks, hand sanitizer etc. We’ve gone through alot of different options and this WORKPRO Tool Bag is our favorite! It lays flat and fits alot of bulkier items like tape and scissors while still being compact.
Another option are electronic or makeup organizer pouches. If you’re looking for more compartments.
AN ART PORTFOLIO FLIP BOOK

A portfolio book is perfect for showcasing all the different prints you have available to sell. We use the hardcover Profolio by Itoya because it gives off a more professional look and the quality of the binder is much more sturdy than the soft covers. This particular portfolio book comes with poly glass pages. We love that it gives off a crystal clear filter and protects the art prints on display as customers flip through the pages. If you want to see these in person your nearest Blick or Michaels should carry them.
We suggest having at least 1-2 art portfolio books available on your table display for each convention. If you don’t have enough room to display 2 books on the table, keep one behind the table to bring out if the table display is occupied. This allows you to cater to more customers who may be interested in looking through your artwork. If you see someone looking at your artwork from afar, you can gesture them over to flip through your art portfolio to see even more prints. It's a great conversation starter and gives customers something to do while they're at your booth.
PLASTIC SLEEVES TO PROTECT PRINTS

Your artwork is valuable and it’s necessary to portray that value to the customer. Packaging your prints in a protective sleeve is a simply way to add value to your print. It shows to the customer that you take care of your prints and that they’re purchasing a quality piece of art.
We purchase our protective sleeves in bulk at clearbags.com! You can also purchase similar items through Amazon for faster shipping and smaller quantities. If you’re in a pinch, you can also find these available at your local art stores such as Blick, Michaels, and Hobby Lobby but beware because the price will be hefty so we definitely encourage buying these online ahead of time.
* IMPORTANT* Be sure to choose a sleeve that has a "protective closure flap" so that the sticky adhesive isn’t on the flap side and doesn't damage your print upon removal!
DISPOSABLE SELF STICK EASEL BACKS

Along with portfolio books on the table, it’s good to have artwork propped upright on a table easel. These Self Stick Easel Backs are LIFESAVERS. They barely weigh anything, and save a ton of space, especially when traveling for a convention. They’re available in a variety of sizes and often come in white or black. We’ve displayed our prints in a clear sleeve with a sturdy cardboard inside, and stick an easel backing to the back of the sleeved print.
You can also use these backings to display marketing materials such as a price list, social media info, etc. We have a sign that we use when we’re away from our table to use the restroom that says “Be Right Back!”. There’s an endless amount of uses for these things and we hope you like them as much as we do!
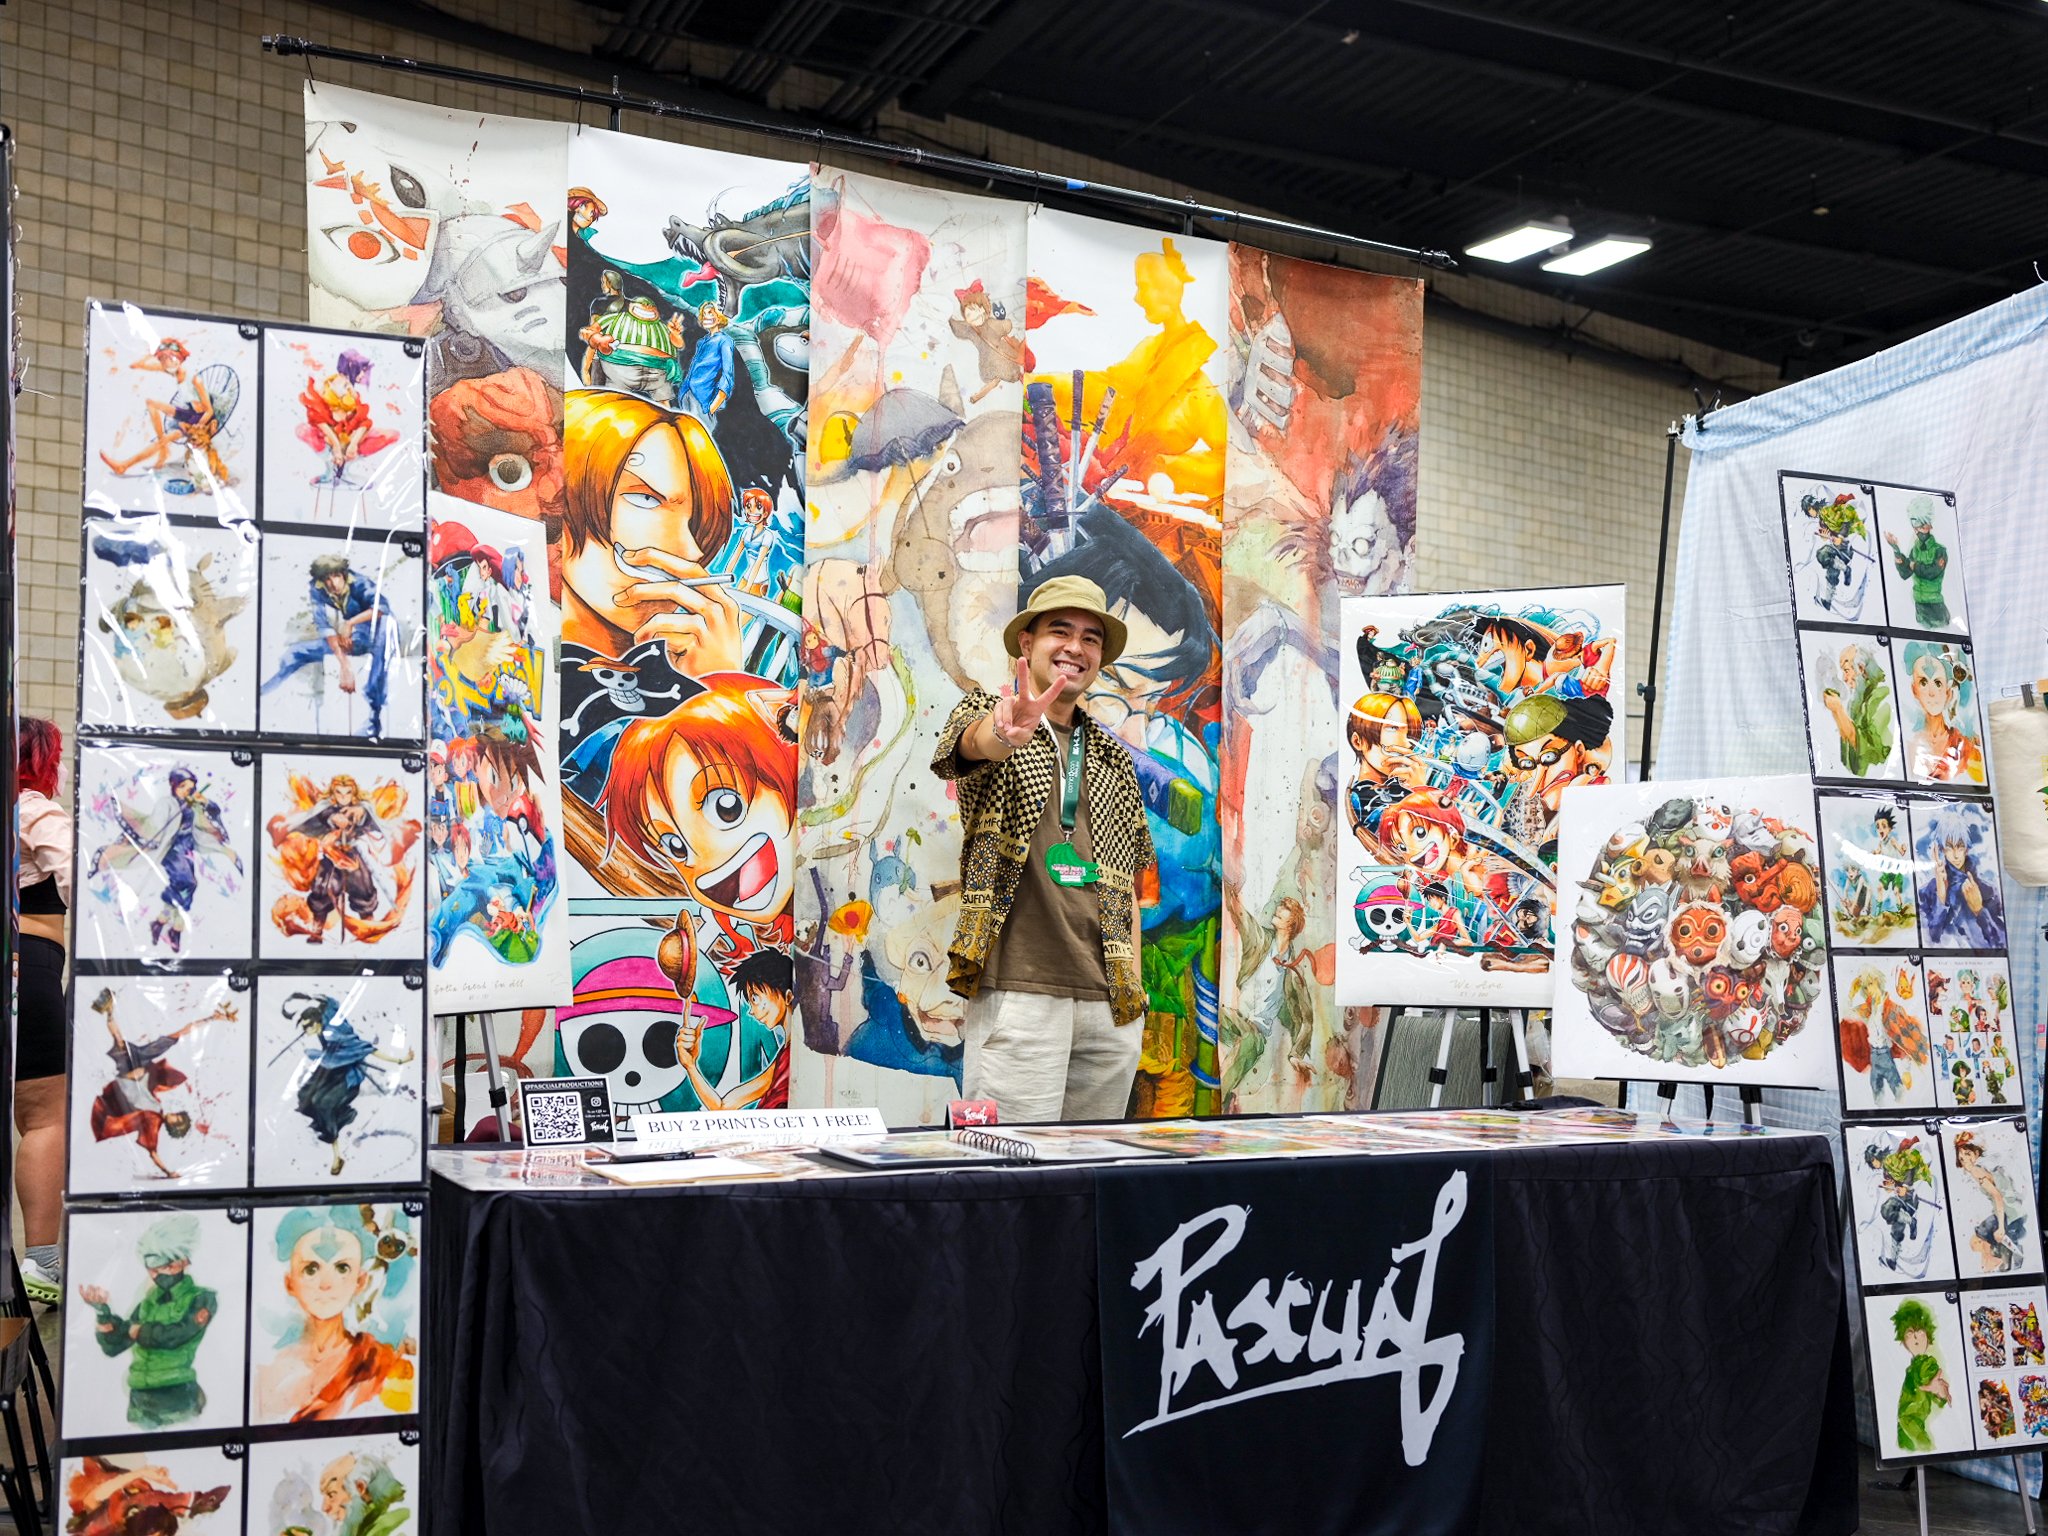
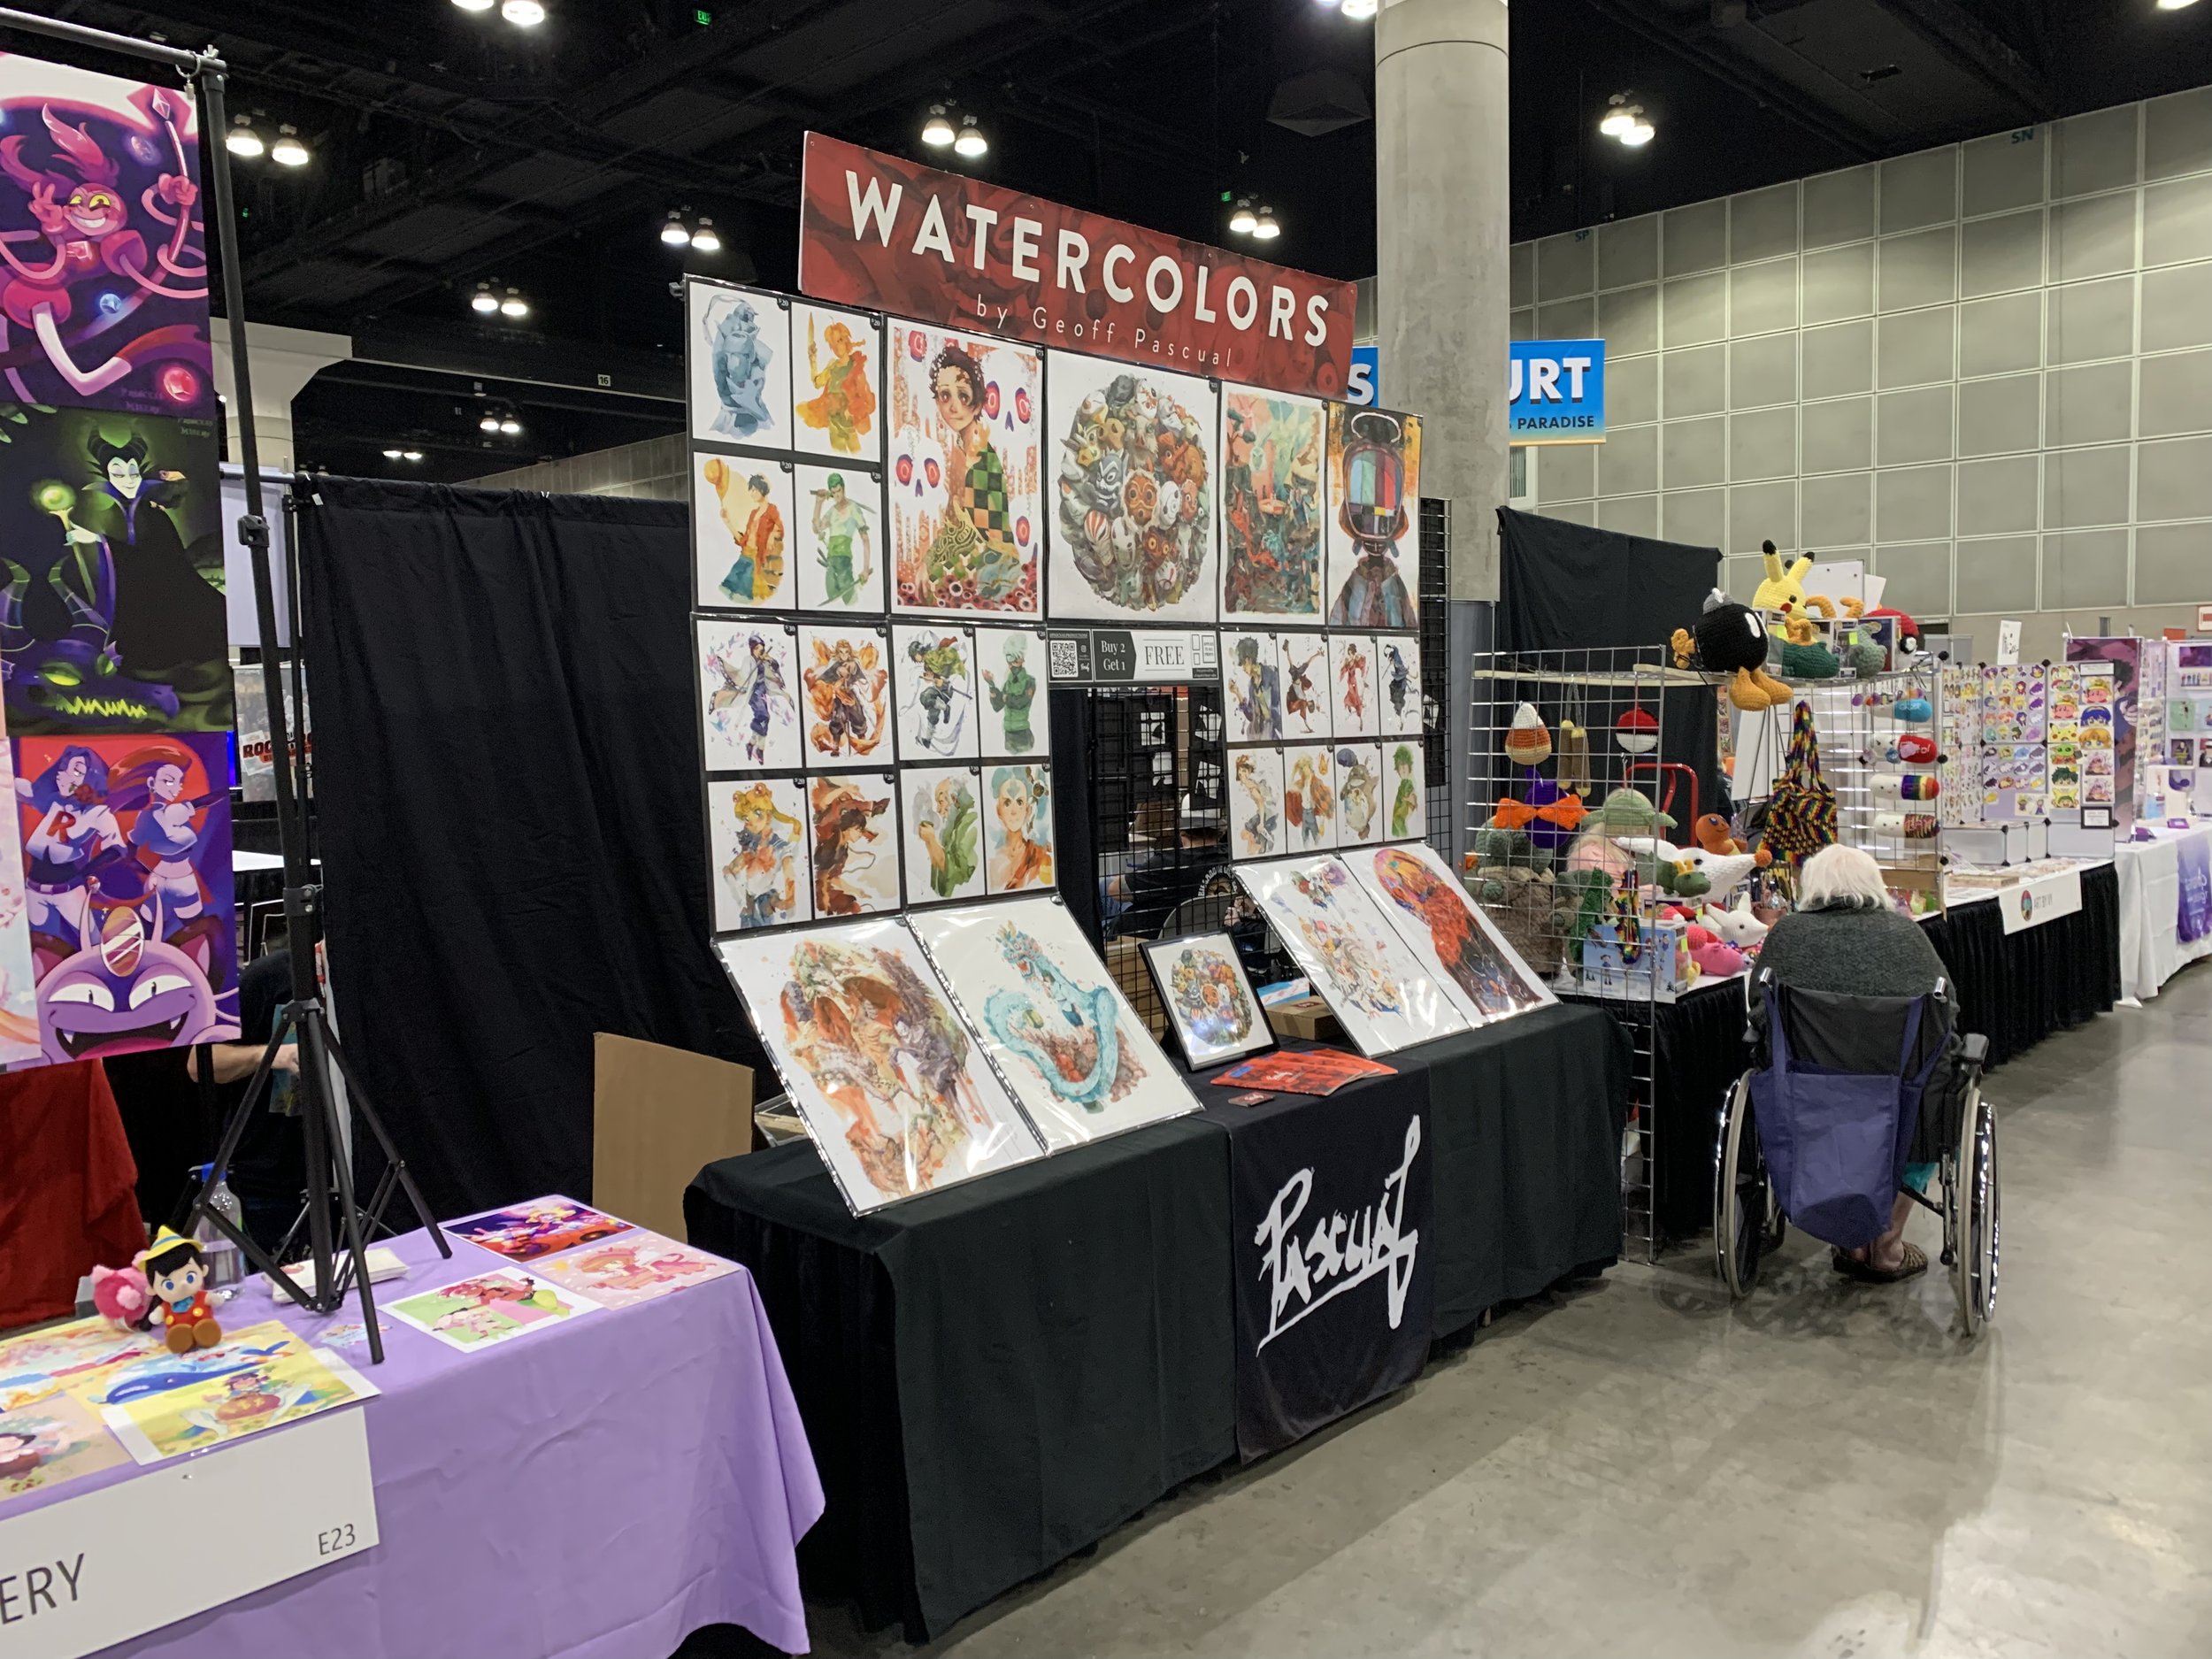
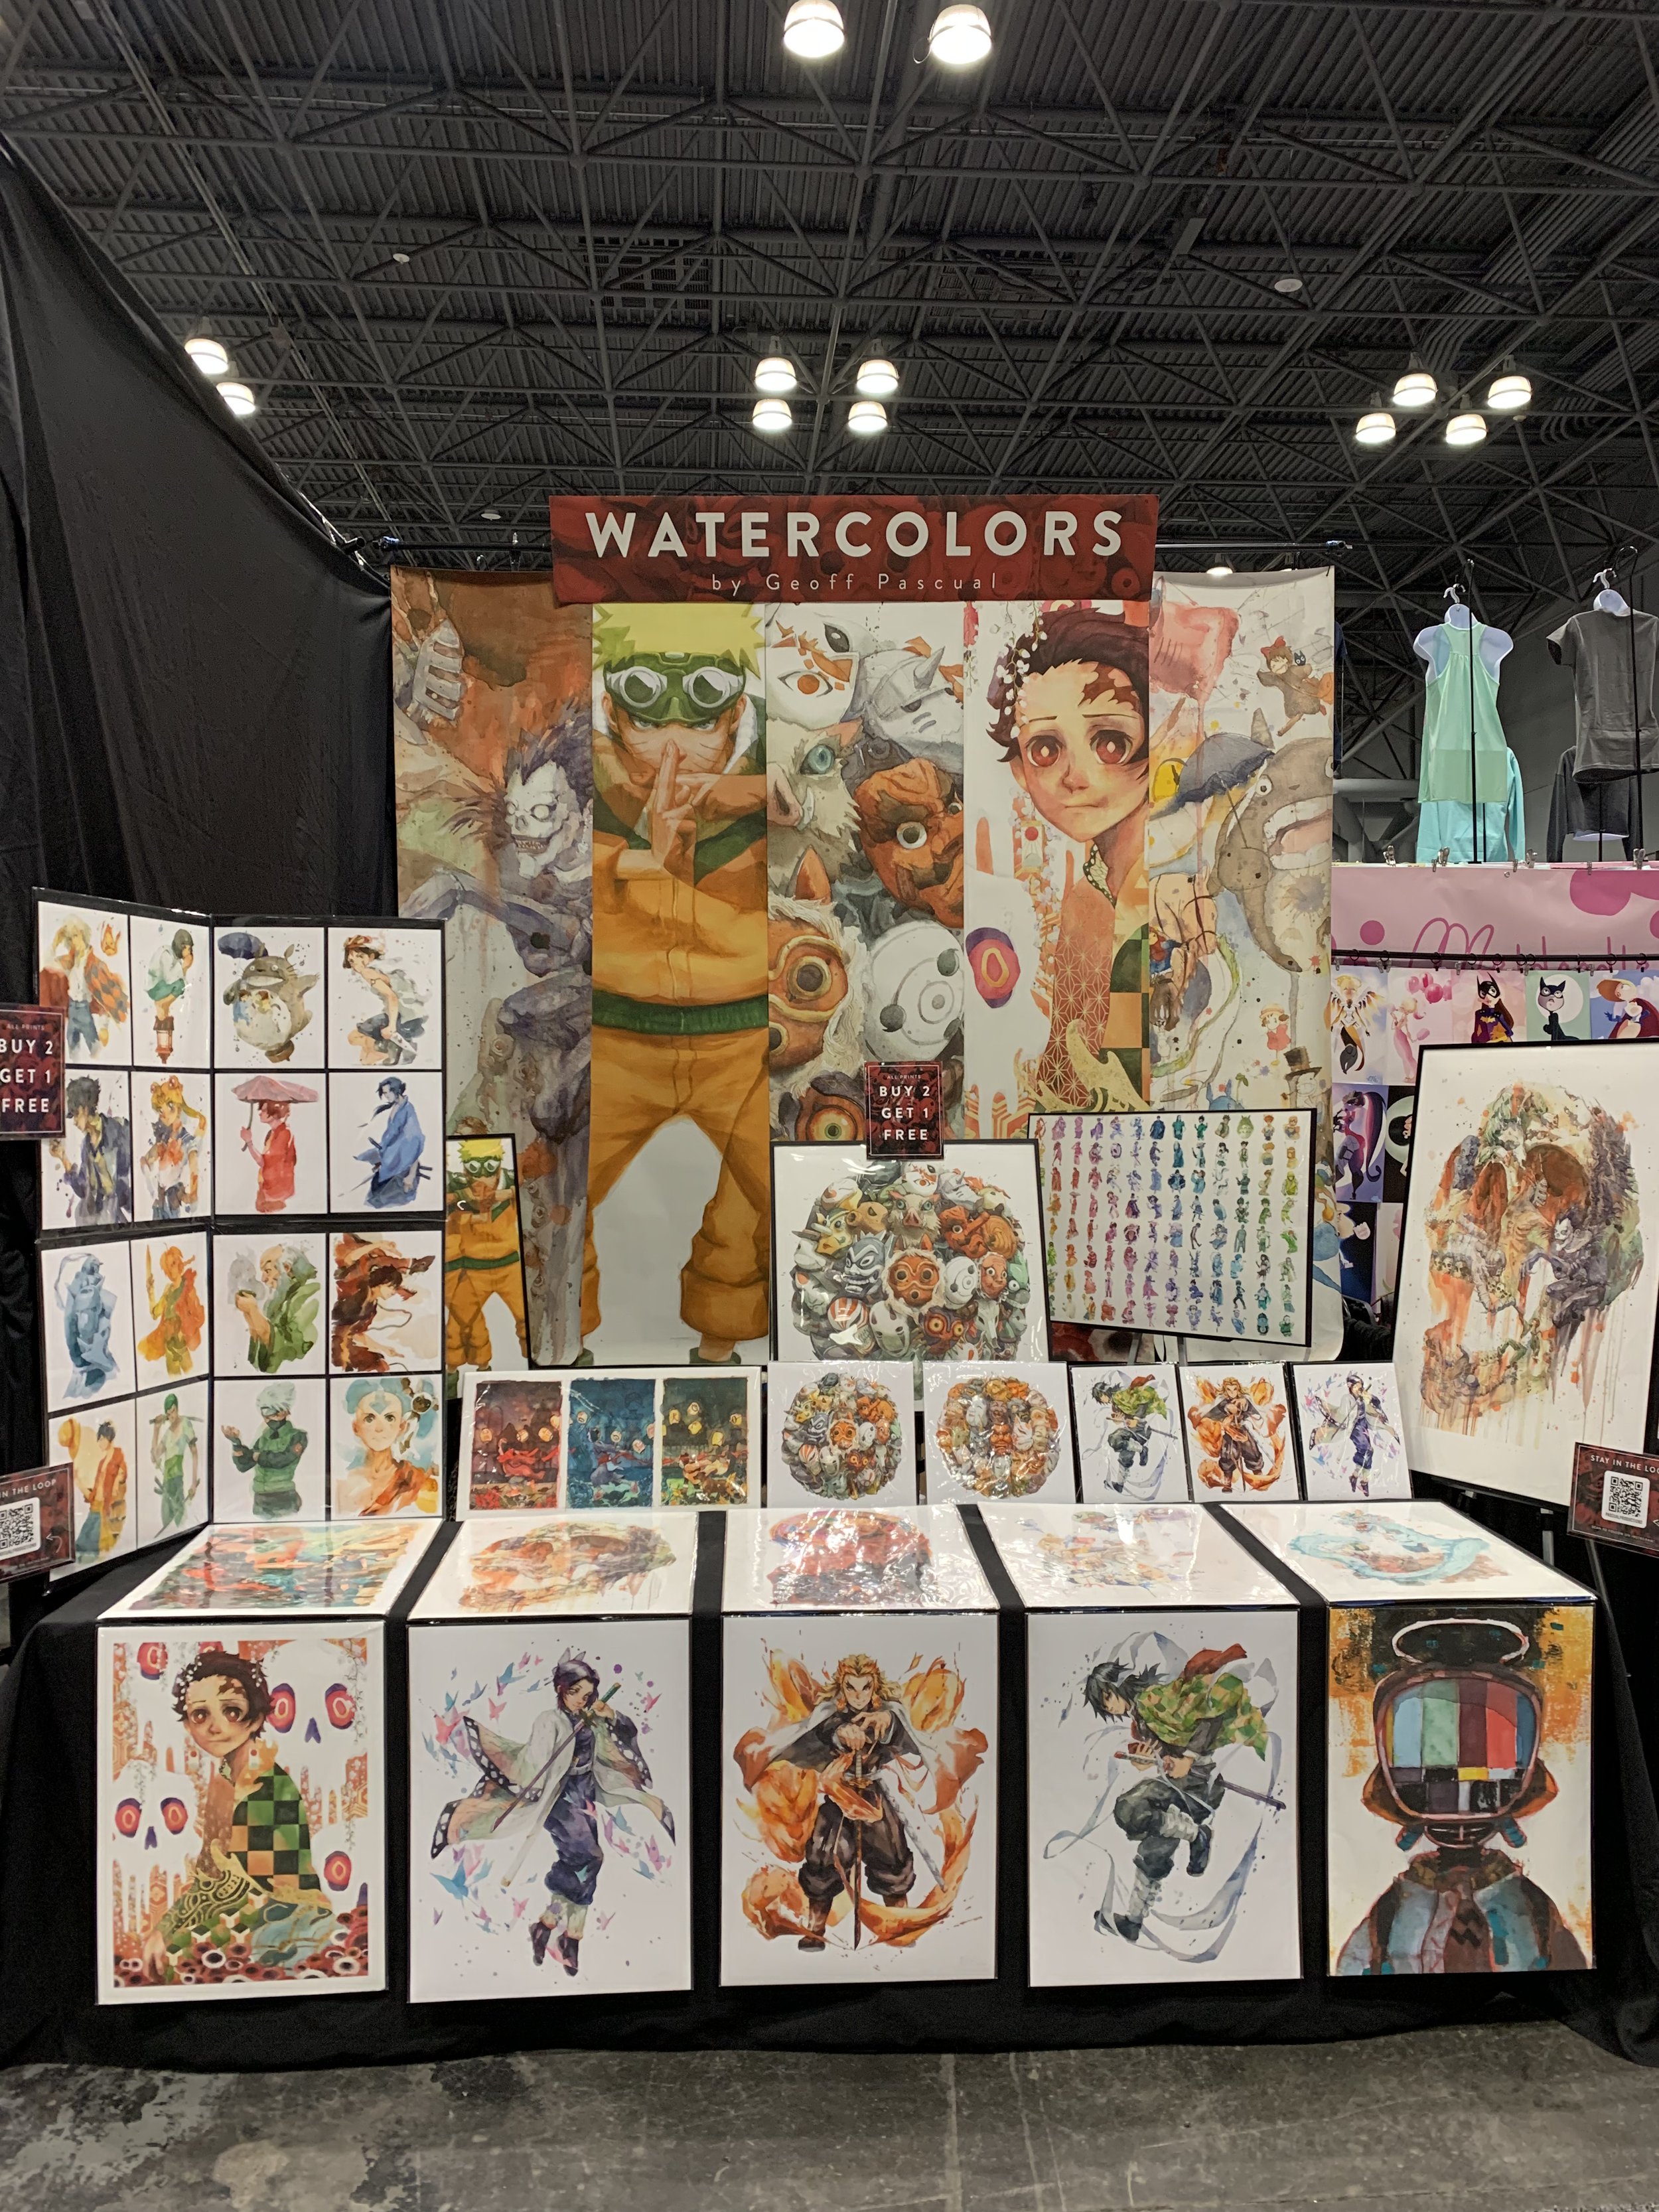
PHOTO BACKDROP TO DISPLAY PRINTS

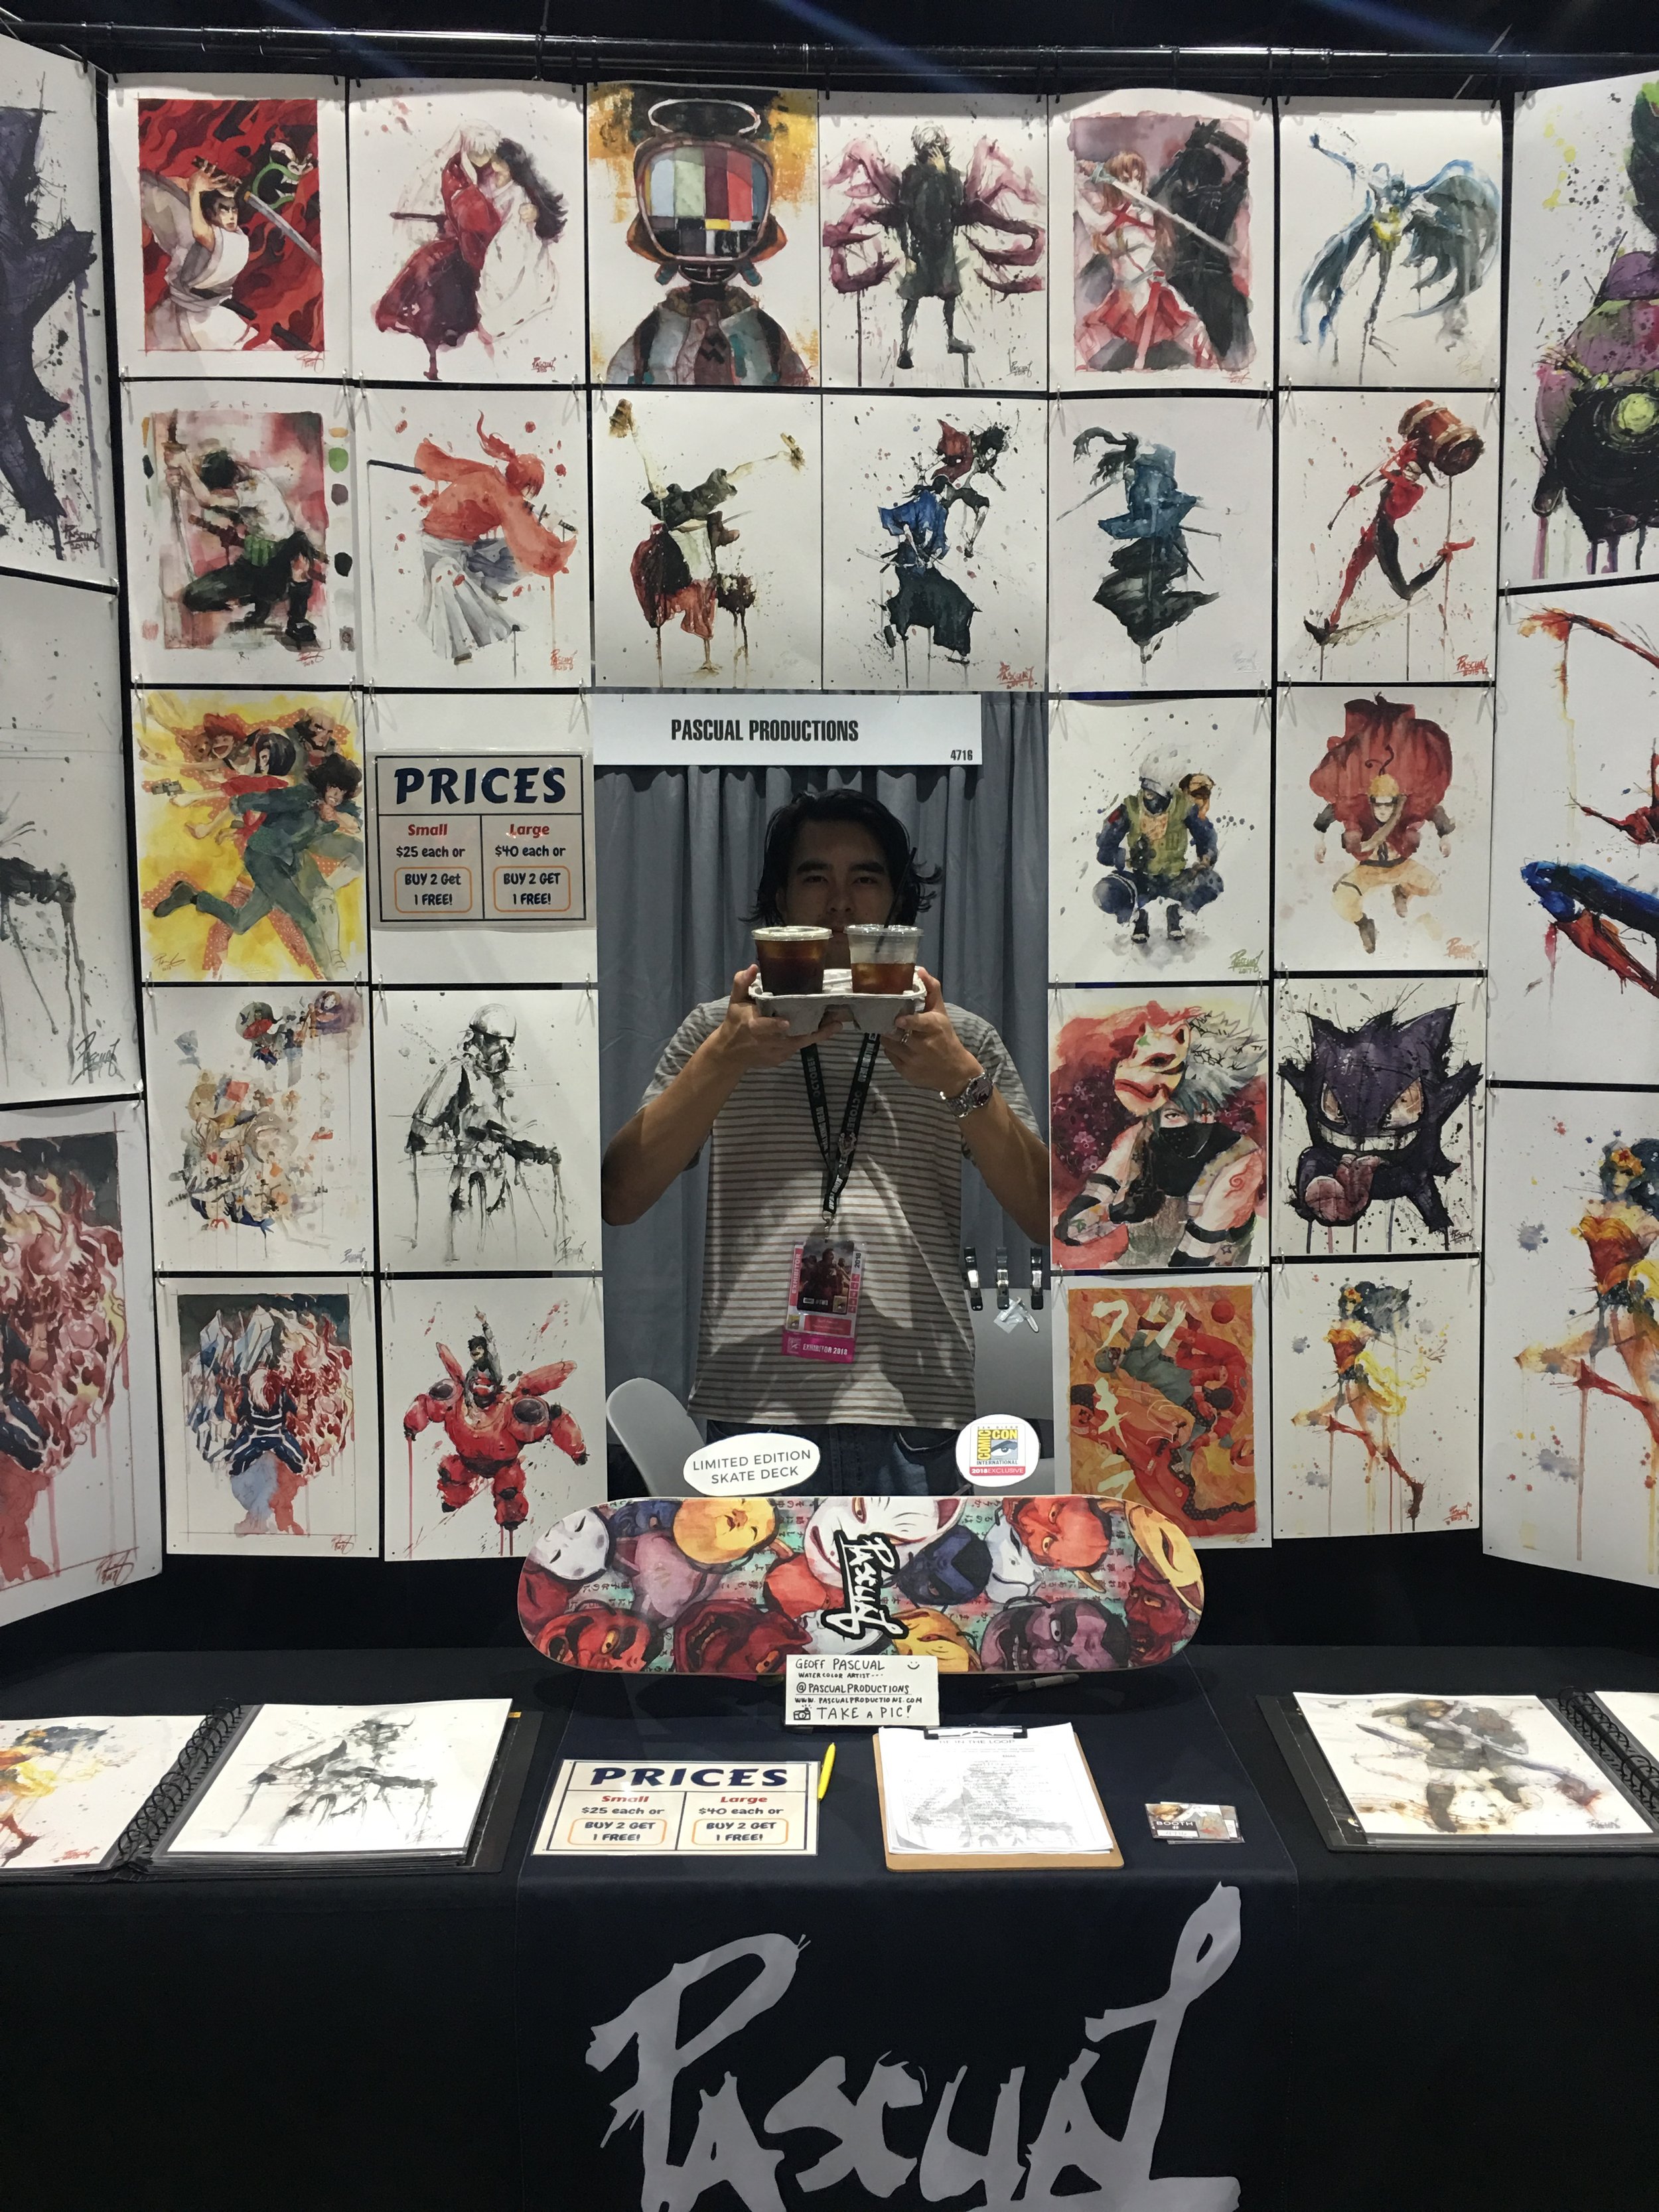
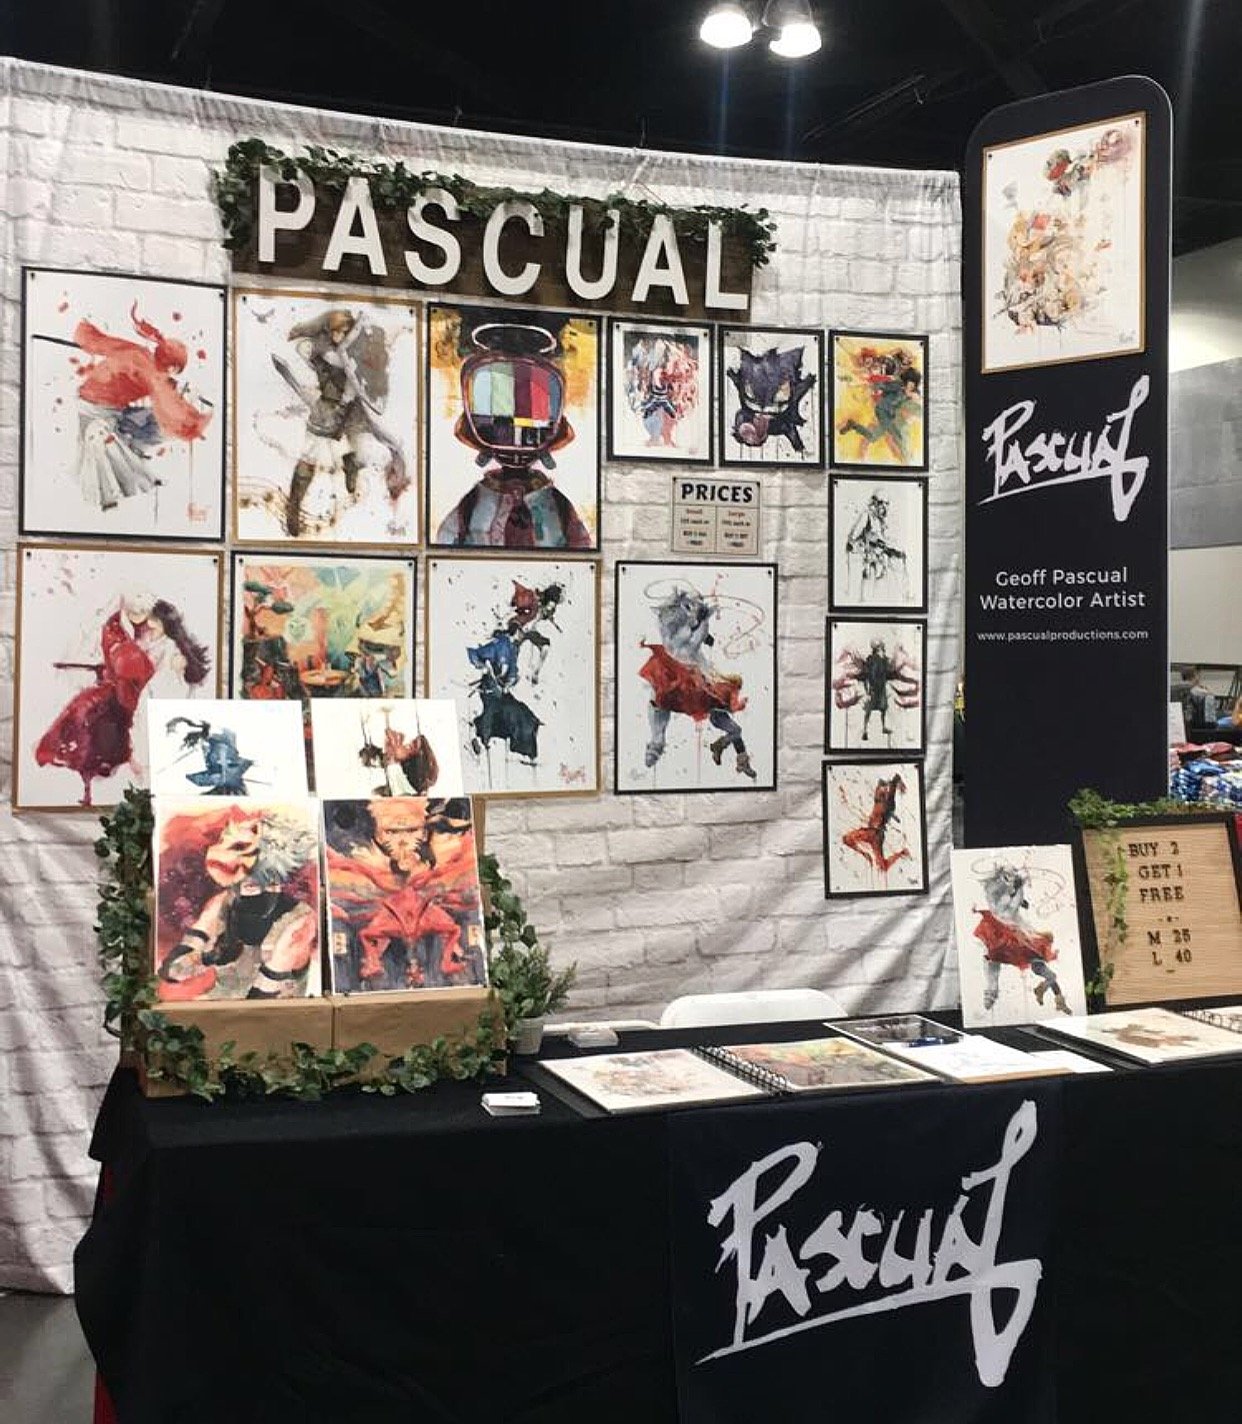
The first question many people think of after they sign up for a con is "How will I display prints at my artist alley table?". There are many ways to display and set up art prints in artist alley, but the most common way is to use photo backdrops. They're light, portable and easy to set up and break down! Some also have the ability to expand up to 10 feet tall, which is perfect for customers to see your display from across the convention hall.
You do have to get creative when it comes to setting up your prints to hang from the display. It took some time and experimentation for us to come up with a clean set up. One option we liked best is to laminate your display prints, hole punch the 4 corners, and then connect the prints using binder rings. Many people also tape their prints in a long column. If you decide to do this, be sure to mount your prints onto a foam board of some sort so that your print’s aren’t easily blowing in the wind. This alls sounds a bit confusing, but I'll try to post a more detailed guide on how to set up your prints on a backdrop in the future!
There are many different kinds of photo backdrop stands to choose from. When you’re searching for a backdrop, it’s good to have one that can reach at least 10x10’ to accommodate varying booth sizes. Another thing to look for is a high load capacity for stability when hanging your prints; this one has a max of 35lbs.
A COLLAPSIBLE WAGON TO TRANSPORT YOUR SETUP

Most conventions are held at a big convention center or hotel/conference hall, so you’ll have to walk quite far to get to where you need to be from your car. Therefore a wagon or dolly will be your best friend. Depending on how much inventory or how large your set up is, there are different weight capacities you can choose from.
This 330 - pound capacity wagon is a good multi-purpose option and is great because it’s collapsible and can be stored away under the table or behind your booth and out of sight when you’re not using it. Having 4 wheels as opposed to the 2 wheeler dolly’s also makes it easier to maneuver, especially around bumps and cracks in the ground. Another option is to fit all your items in a luggage. We use this method often when we are traveling on a plane to a convention. Check back for my next blog post about traveling out-of-state!
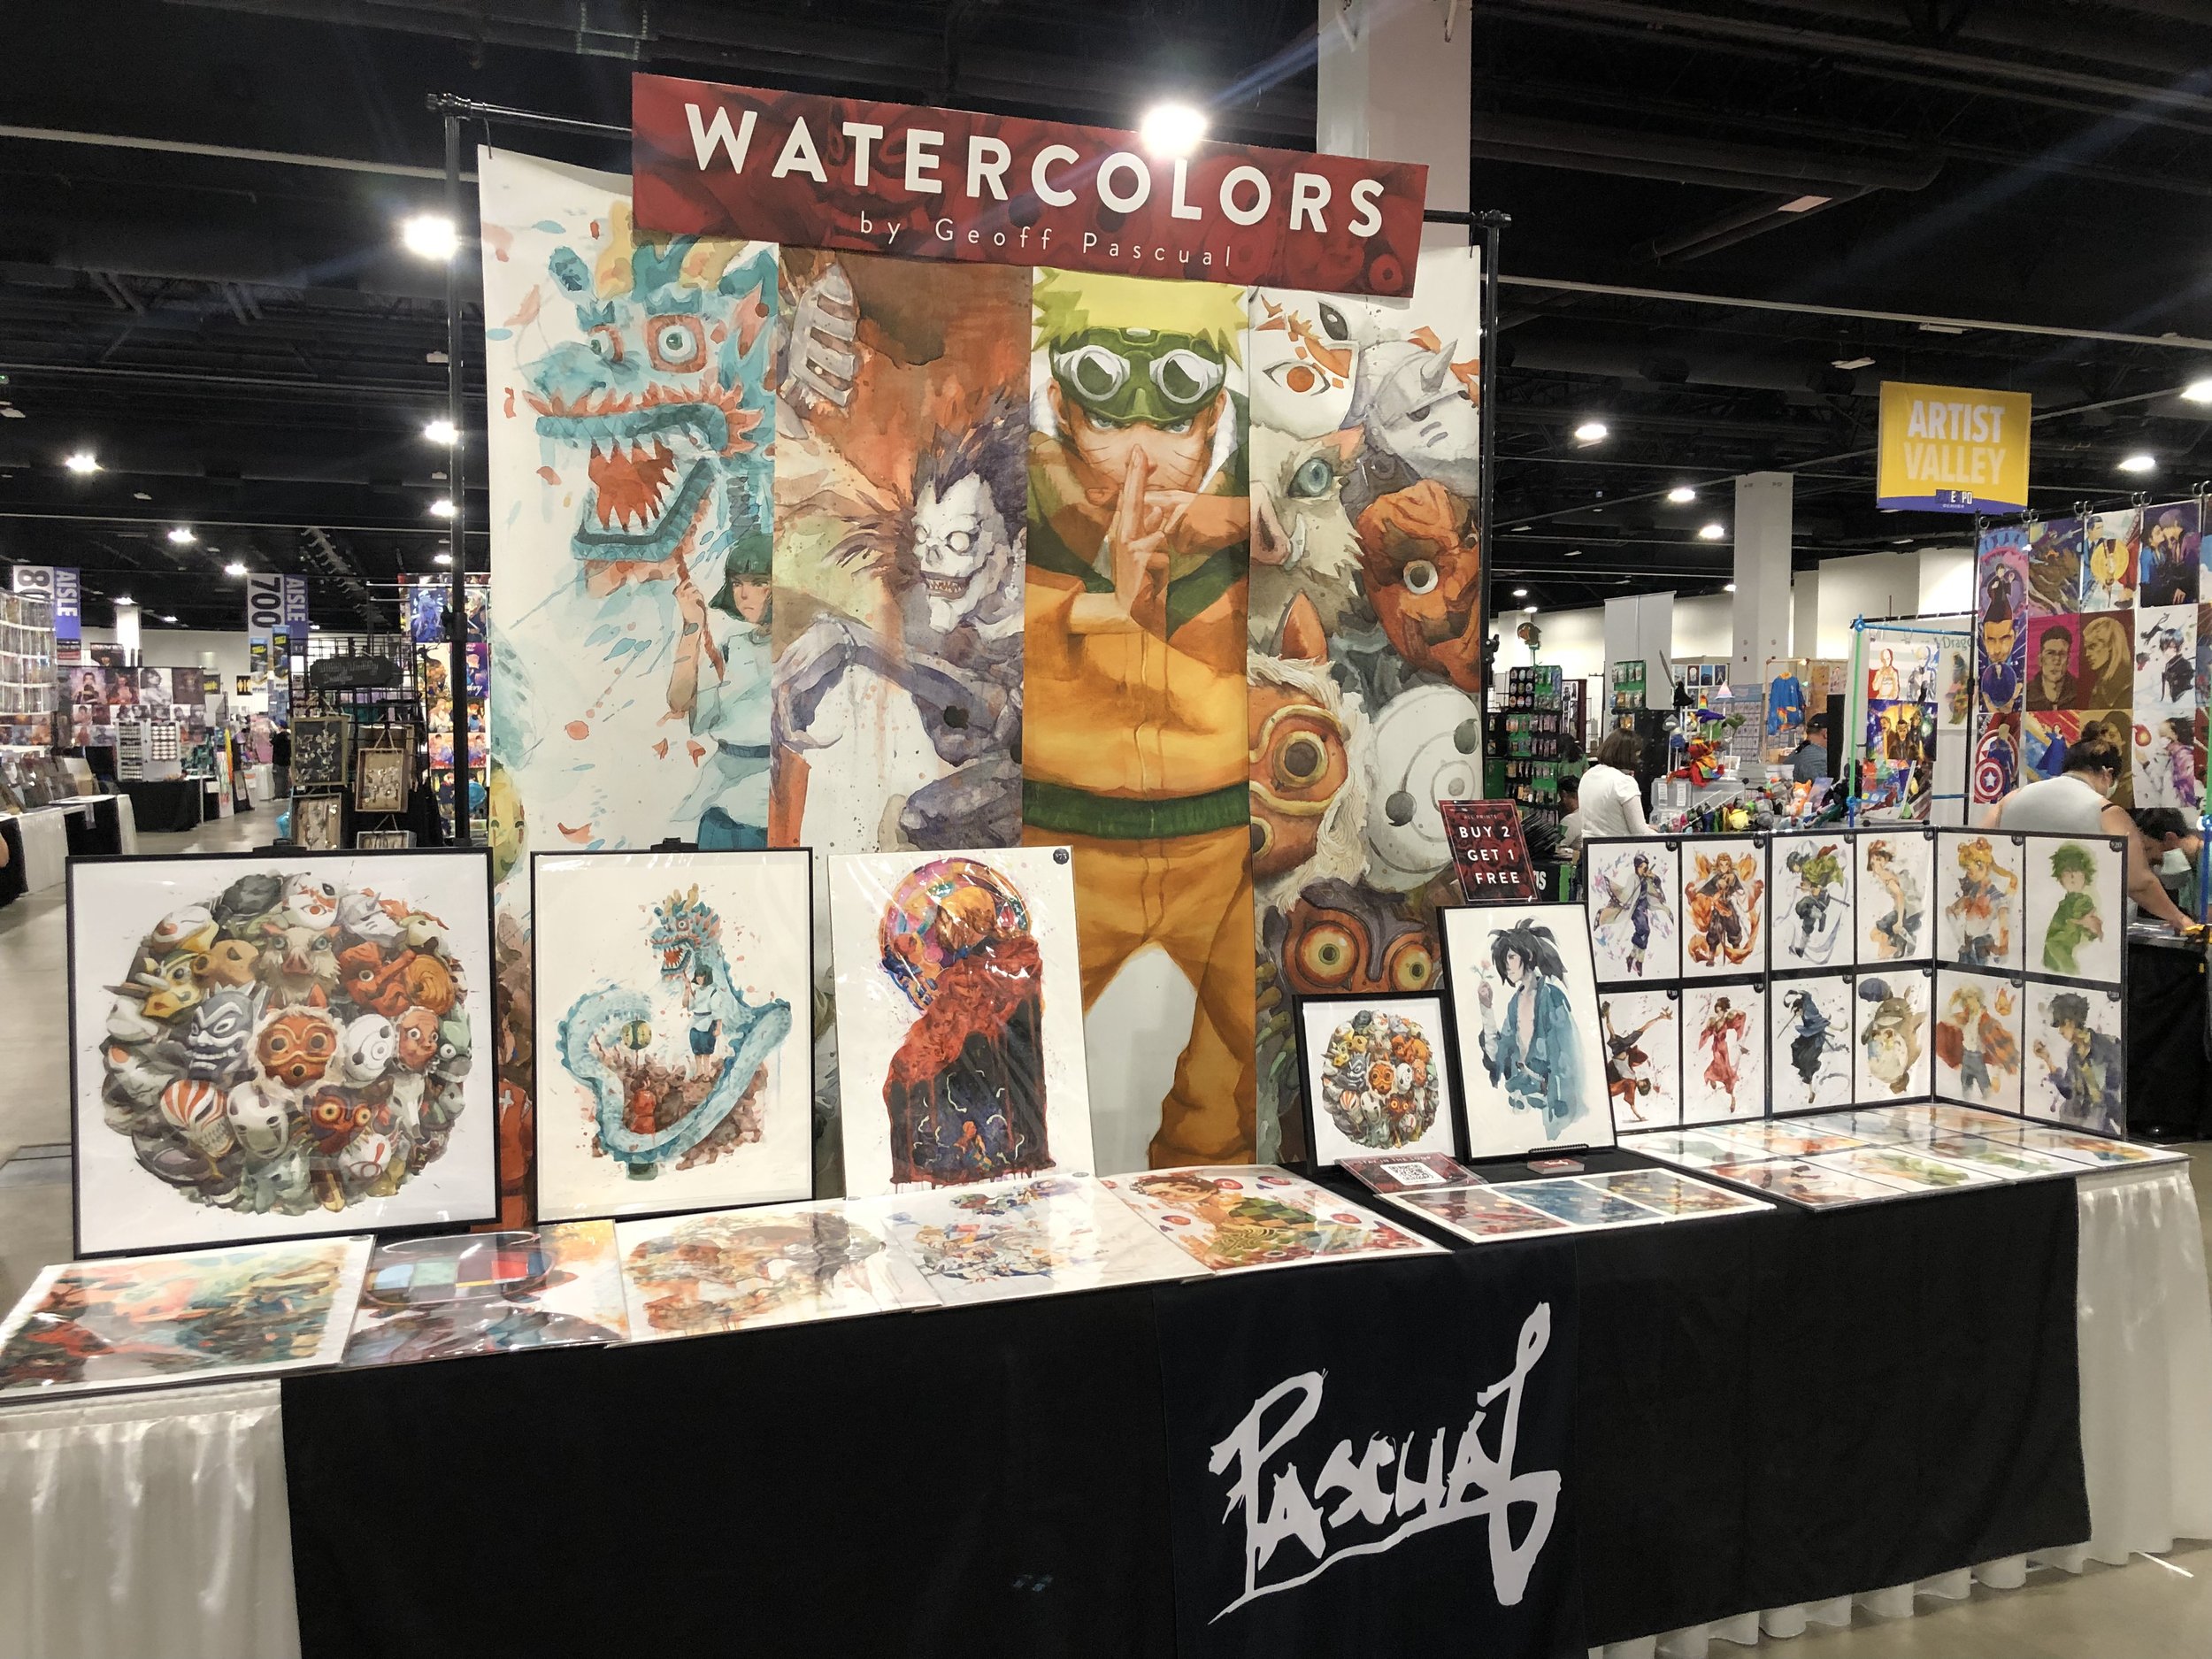
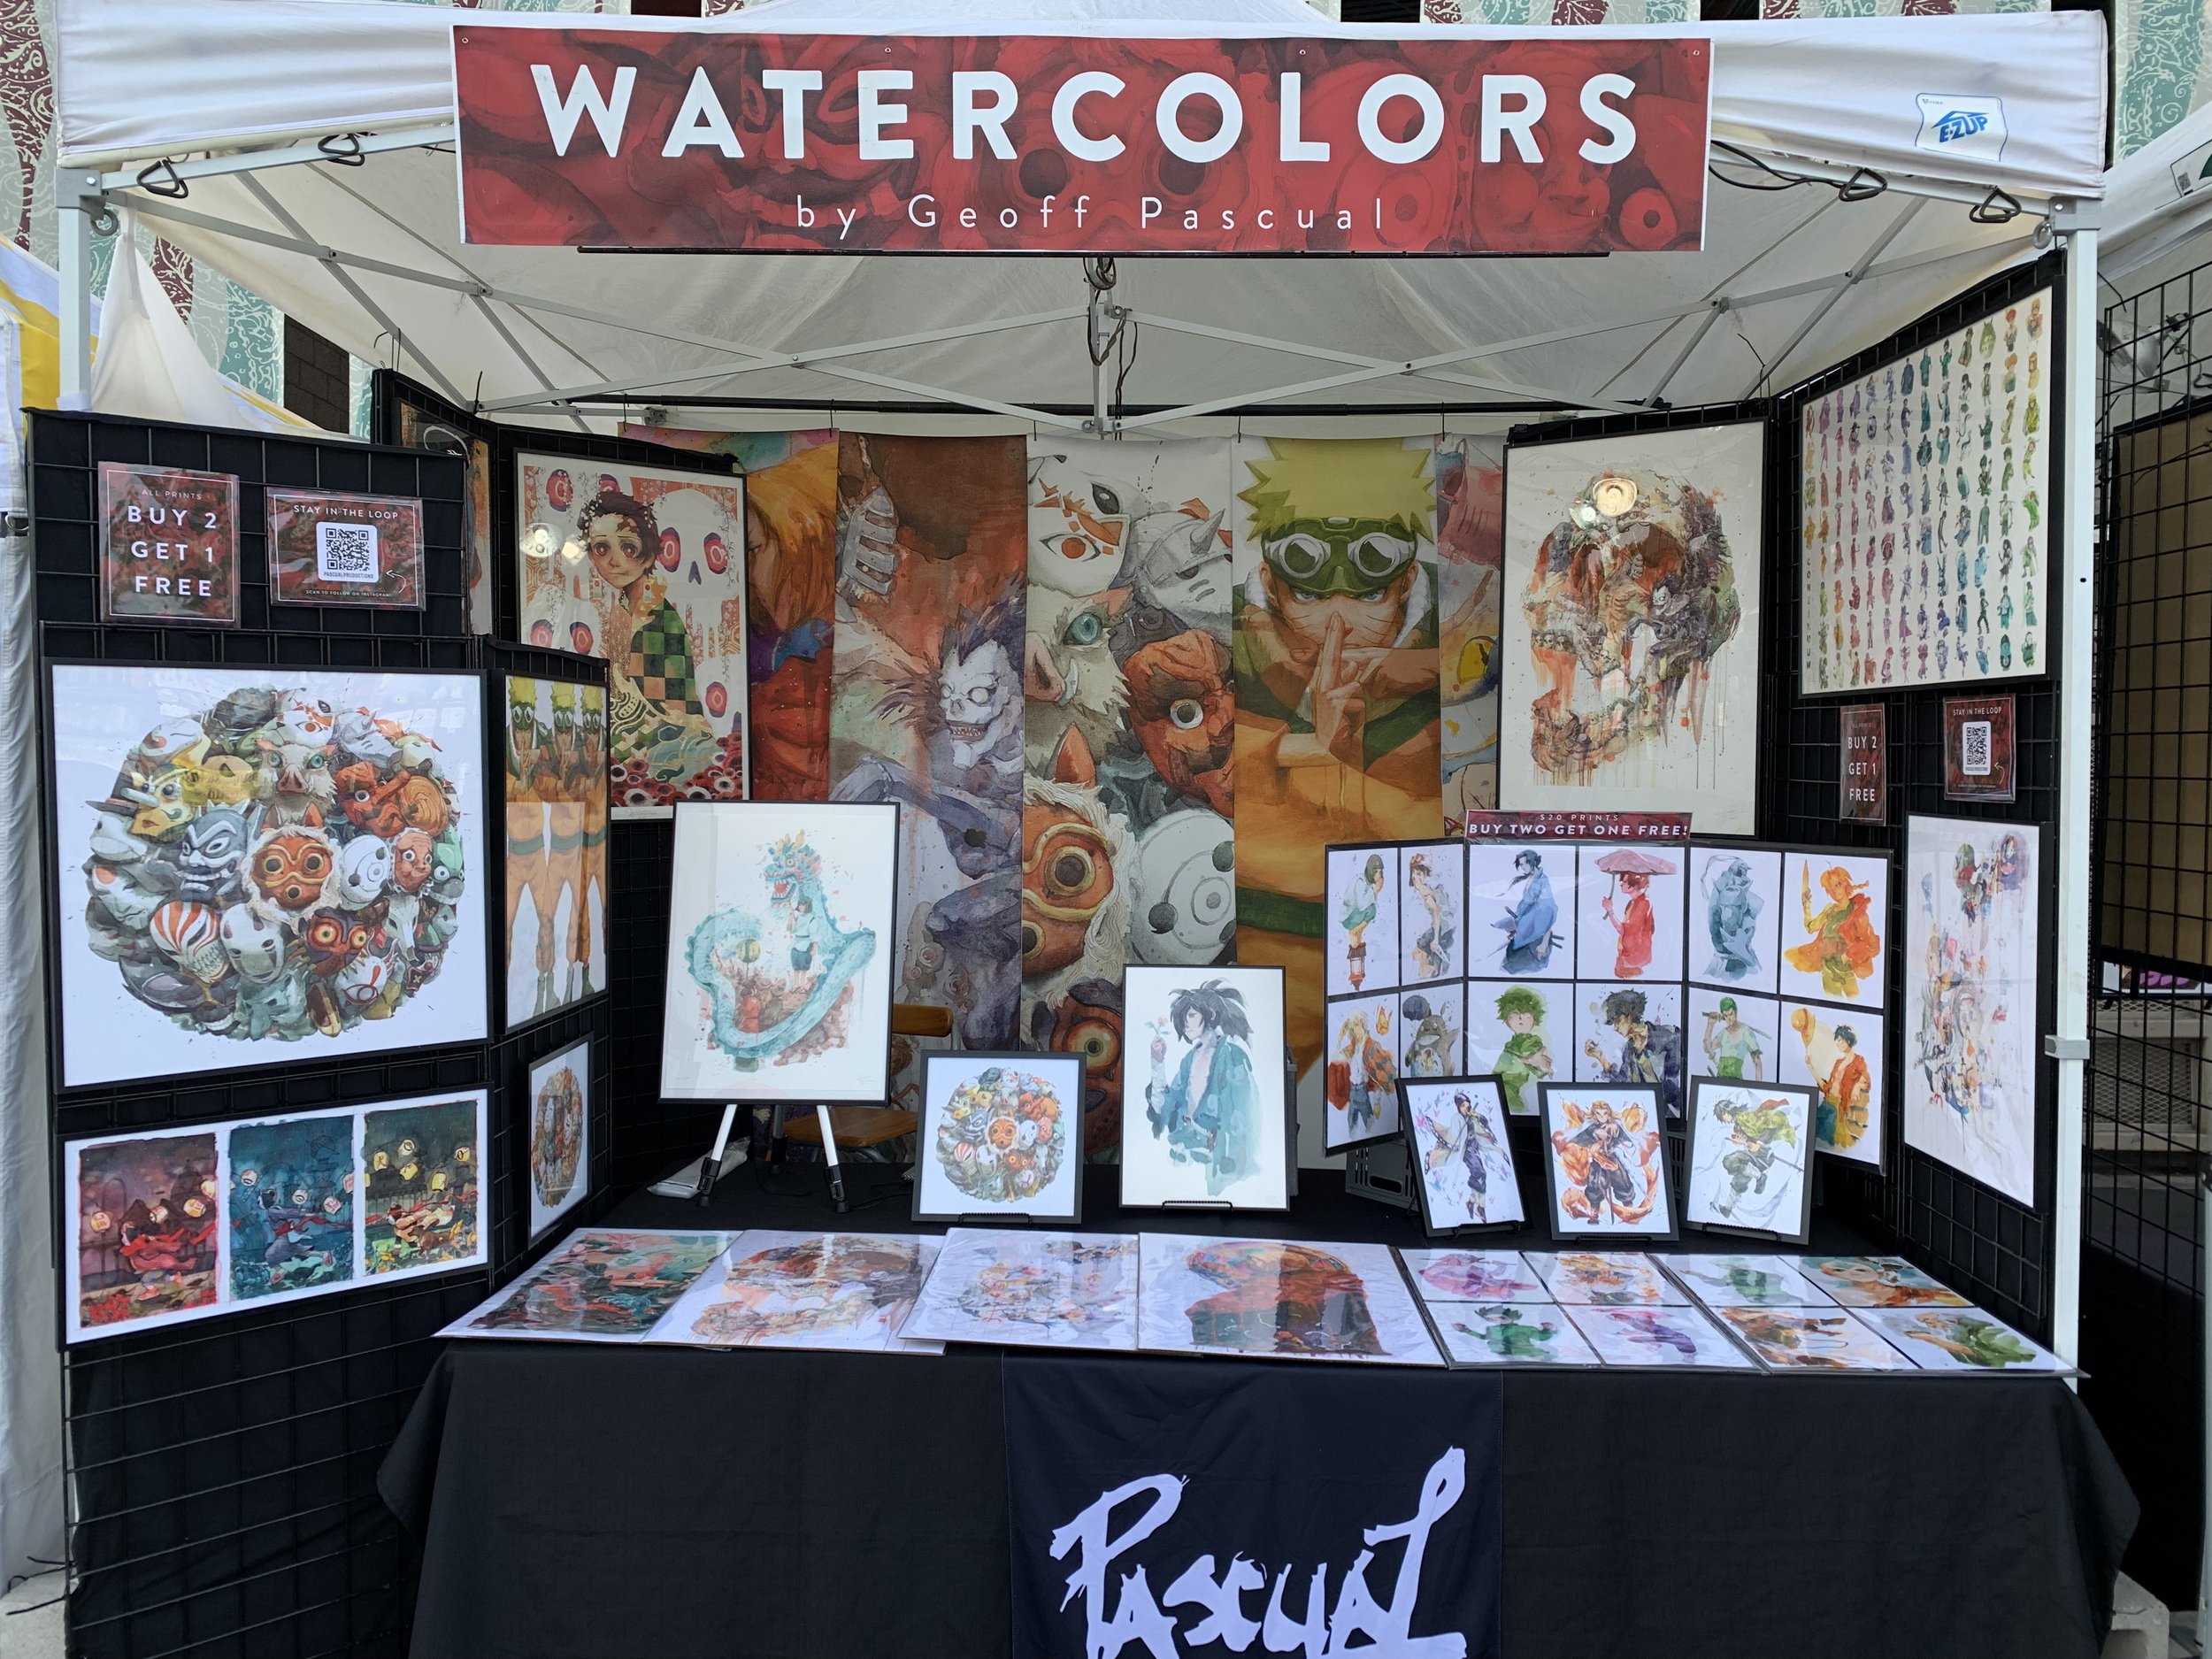
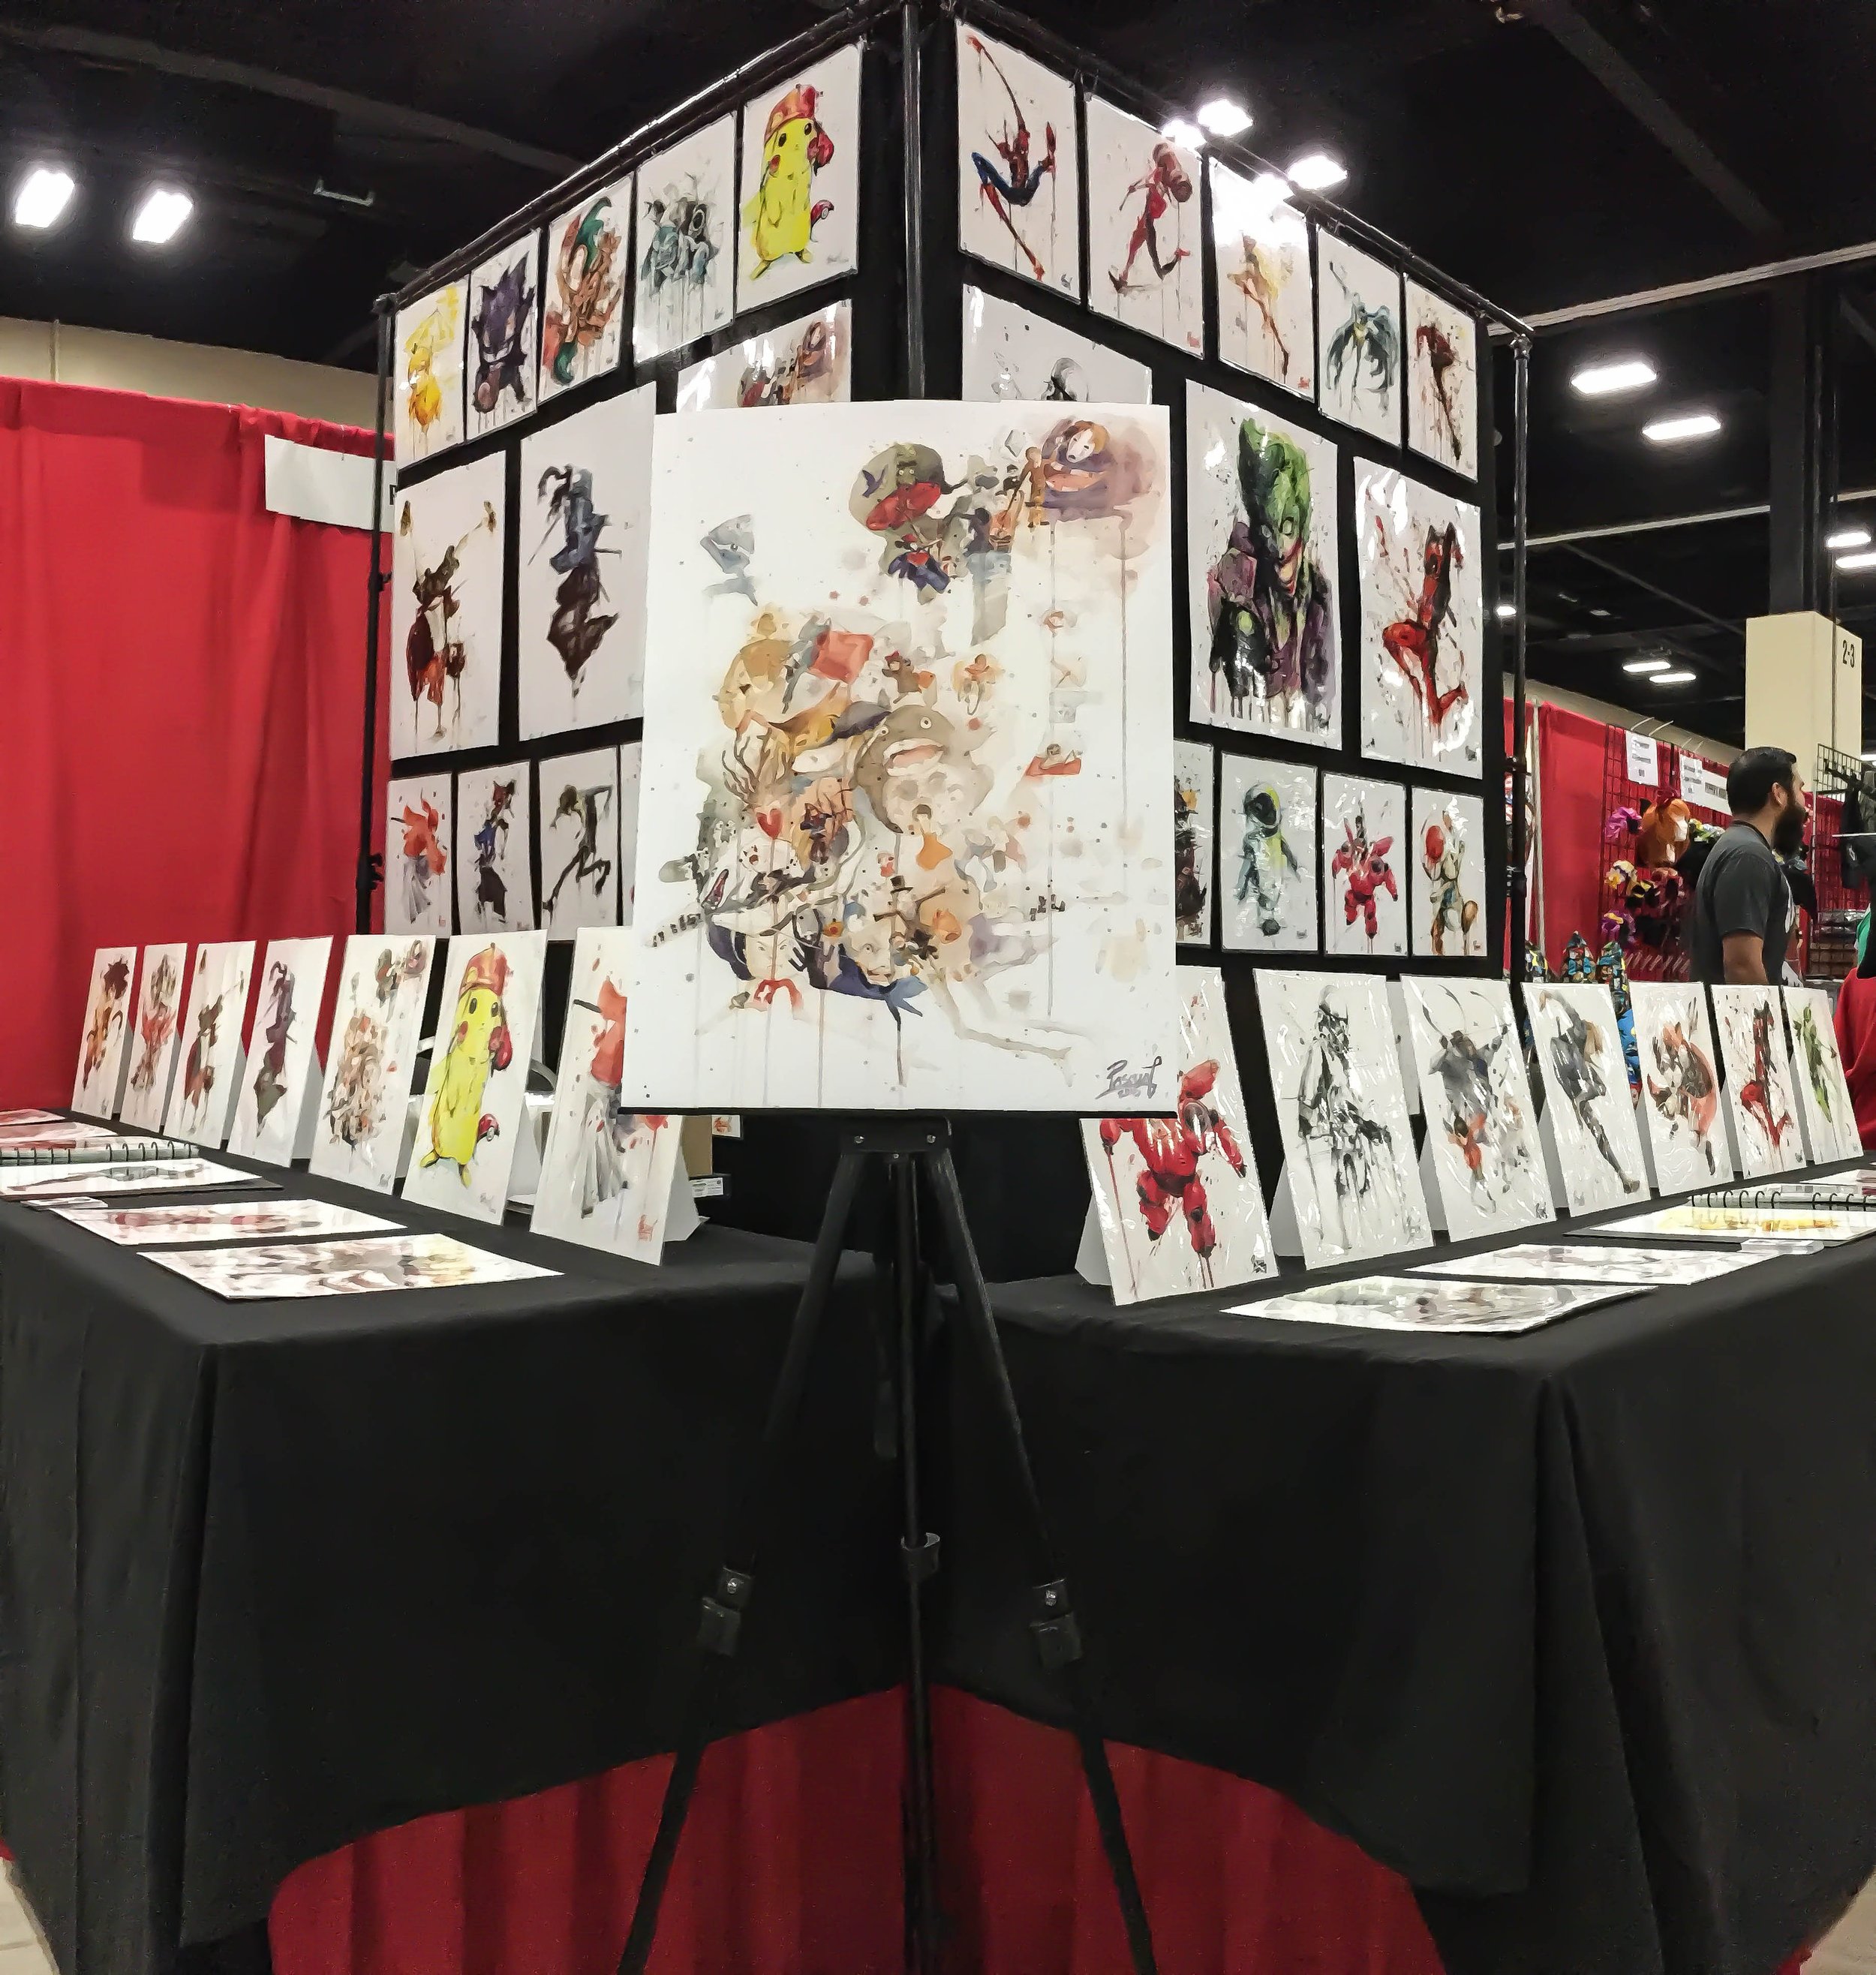
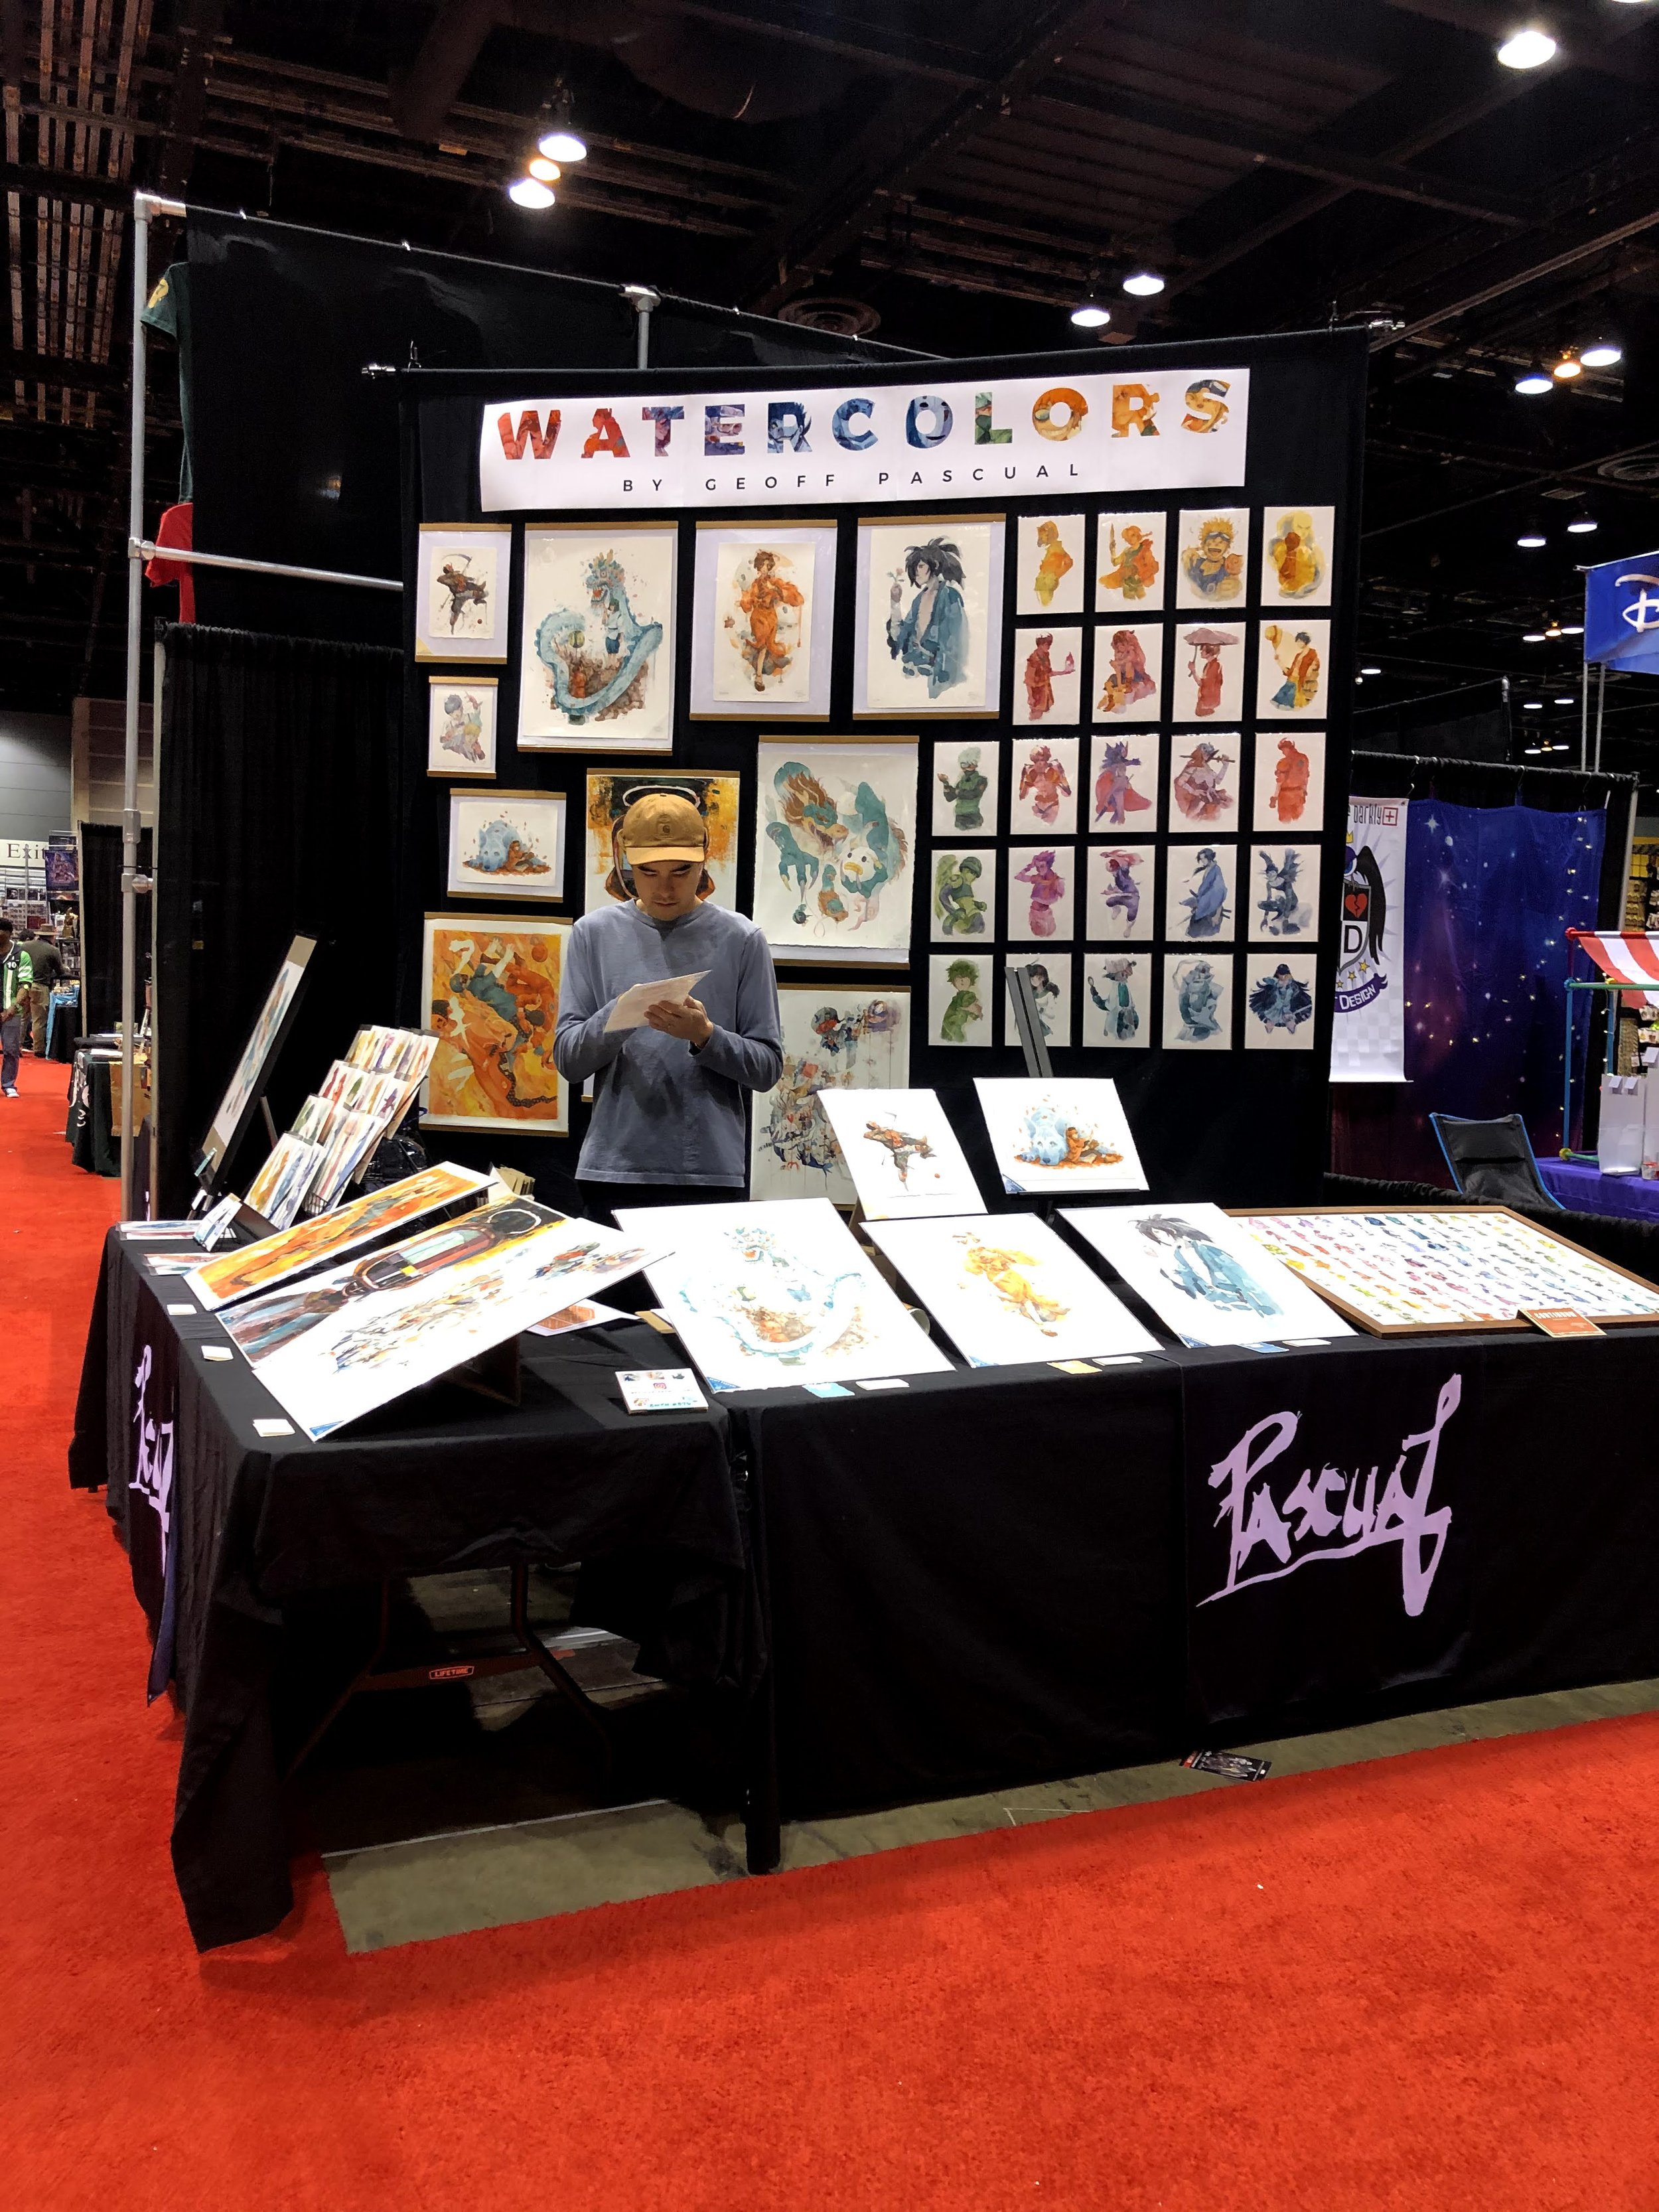
Hopefully these items will help you get a jump start into having a successful first time artist alley experience. For more inspiration I'd suggest you go out to a convention and look at how other artists display their products in the artist alley. We’re a friendly bunch so don’t be afraid to ask us questions! I added some photos below of our many different setups throughout the years for inspo!
If you have any other questions about what to bring to artist alley and how to display your artwork at events, feel free to drop a comment below! Maybe we’ll see you at the next convention, good luck! :D
- Jana Rae Pascual (The Waifu)
This page contains affiliate links. If you choose to purchase after clicking a link, I may receive a commission at no extra cost to you. Thank you for your support!